Let’s review the three previous ways to begin “squaring up” a trapezoidal seat before I show you the fourth method to start a paper rush seat,
OK? Just as a reminder, trapezoid seats are wider in the front than in the back. To weave evenly around each corner, the seat needs to be square or rectangular in shape.
So, the solution is to fill in the side rails, called gussets, in the front corners of the seat first. Then, once the distance on the front rail between the rush equals the distance on the back rail, weaving can begin going around all four corners.
TWW is reader-supported, and as such, this article may contain affiliate links, which means that if you make a purchase using these links, I may receive a commission at no cost to you. As an Amazon Associate, I earn from qualifying purchases.
#1–Standard Way-Use Upholstery Tacks
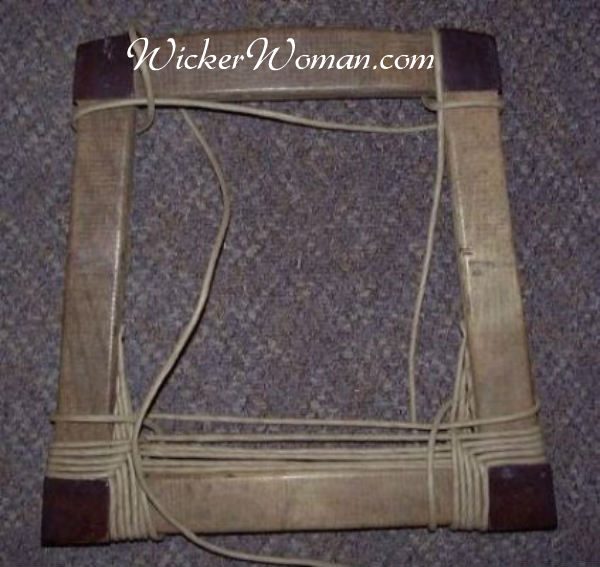
The most common way to start a paper rush seat is to use galvanized upholstery tacks to secure short gusset strands of rush to the inside rails.
Strands start on the inside left rail with a tack inserted through the end of the rush, and then they each get a tack at the end of the strand on the right inside rail.
This method can severely damage the chair rails, especially after many replaced seats if every weaver uses it, nailing in each strand.
Read More–What is paper fibre rush?
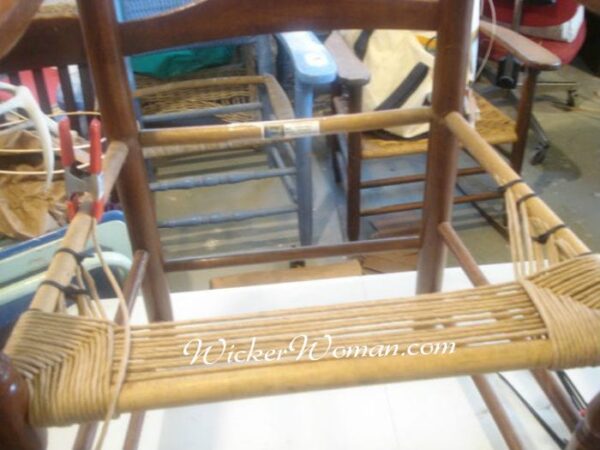
#2–Alternative Start Using Cable Ties
Another way to start the paper rush strands in the gussets is to secure them individually to the side rails using nylon cable ties.
If you can find the cable ties in a clear or opaque color, it would be best to use those instead of black.
But since I only had the black ties in my shop at the time, I used what I had. However, I was careful to make sure the black ties were well covered so they didn’t show through the strands of rush on the sides.
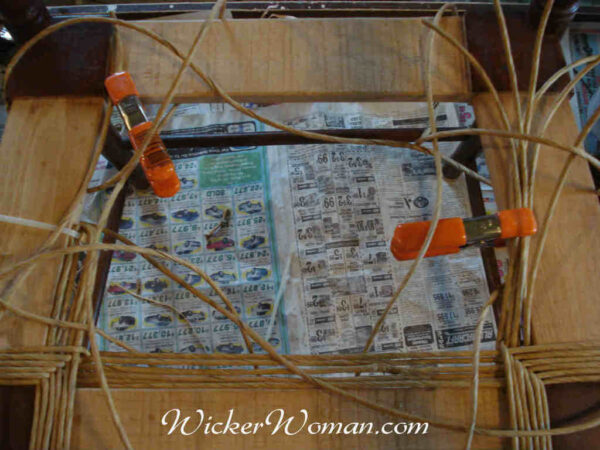
#3–Alternative Start Using Cable Ties on Left Rail Only
This third way of starting the paper rush strands in the gussets uses nylon cable ties only on the left rail.
All the short gusset strands are doubled and folded over so one cable tie secures all the strands. A spring clamp holds the ends on the right rail until later on when the clamp can be removed.
Then the tension of the horizontal woven strands will keep the end strands in place without the spring clamp.
#4–Alternative Start Using the “No-Damage-Side-Rails” Technique
As promised, here’s the fourth and final (until I discover another) way to start weaving the gussets strands of a paper fibre rush chair seat.
All these processes and steps are called “squaring up the seat,” which is what you must do to a trapezoidal seat before you can weave around all four corners evenly.
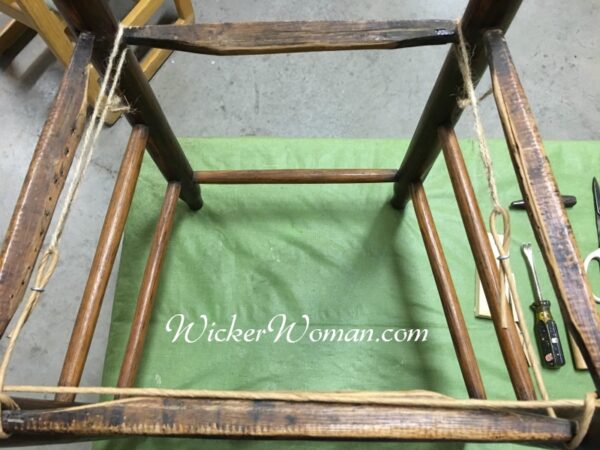
Joining paper rush strand using “no-damage-rails” hog ring technique
I’ve coined the phrase “no-damage-side-rails” for this technique because there’s no need to use tacks or anything else on the rails to start the paper rush gusset weaving.
Steps for the 4th Way to Start a Paper Rush Seat
Use this terrific starting method with hog ring clips and hog ring pliers on any antique chair or chairs with rails already peppered with tack and nail holes that you don’t want to damage further.
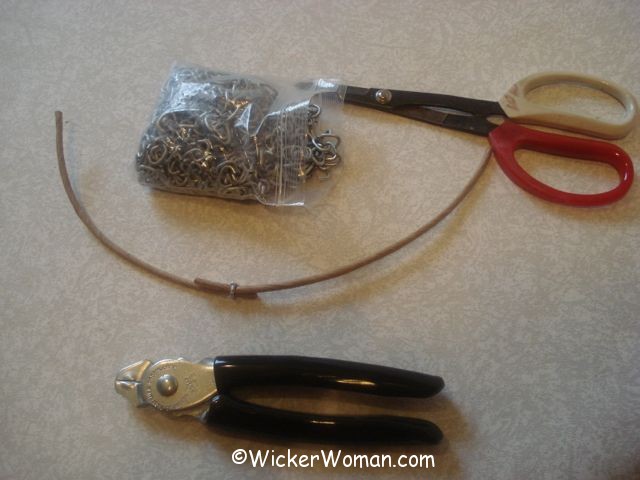
- Just tie a bit of jute or string in a circle around the back rail, one on each side
- Measure the length of rush needed to go around the two front rails and cut to length
- Start on the left side by looping the rush end over the string loop, pull down a bit and attach end to the weaving strand with a hog ring and clamp closed with the pliers
- Weave rush around both corners in the pattern sequence to square the seat
- Secure end on the right the same way as you did on the left
- Take the folded-over rush strand through the jute circle and then attach the end to the weaver strand using the hog rings
- Continue in this manner until side gussets are filled and front and back rails are equal measurements
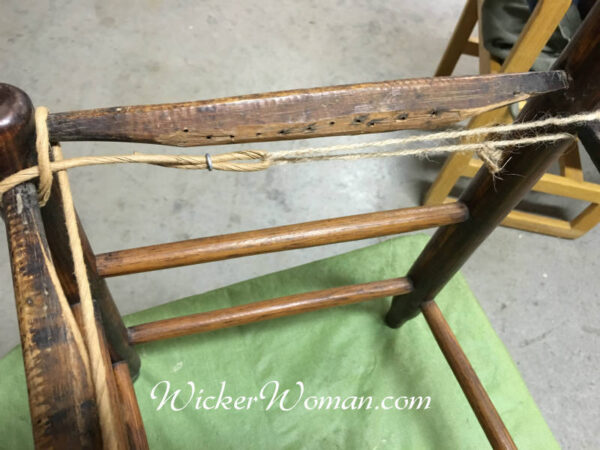
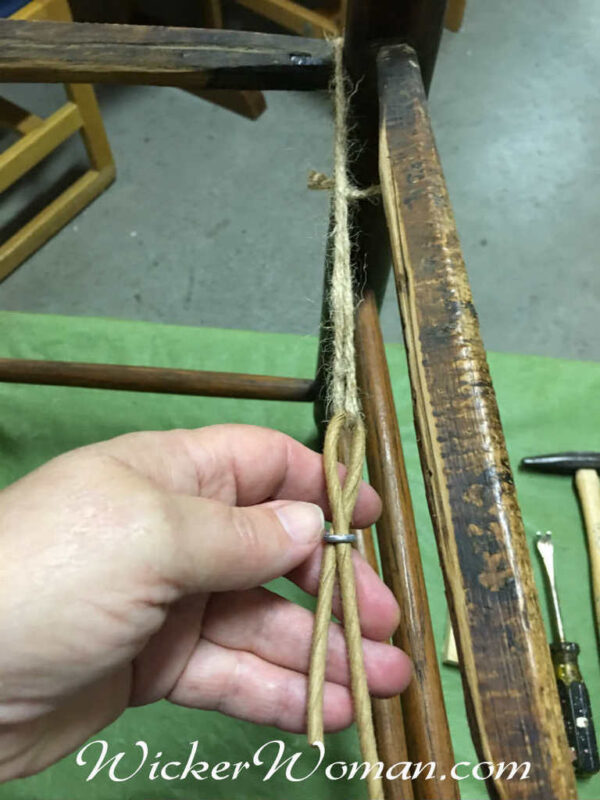
Then too, you can double the length of the strands, looping the centers through the jute circle. Then you won’t need the hog rings on the left, only on the right to secure the ends.
All the bulkiness of the starts and ends will be absorbed within the gussets and will be covered up by the weaving throughout the remaining part of the seat.
Stuff and pad as usual with cardboard triangles in the gussets both on the top and bottom of the seat.
Read More–Why stuff a paper rush seat?
Well, I hope you’ve enjoyed this little series on how to start a paper fibre rush chair seat. Do you have any alternative ways you’d like to share with us? Please leave a comment below!

What are your thoughts about this blog post?
Leave your comments below and share with your social networks!
~~Live Well, Laugh Often, Love Much ~~
Happy Weaving, until next time!


Life saver for a novice! The old chair I want to repair has really hard wood side rails. Though whoever made the chair, roughly 70 years ago, used tacks, I couldn’t get my tacks to go into the wood without bending. My husband had no luck either. I used painter’s tape because that’s what I have on hand. It was a relief to see that masking tape is fine to use.
I suppose the purpose the purpose of the gusset is to fill in the corner rather than to hold weight.
Kathy,
Thanks for visiting my site and I’m happy that these various ways of starting a rush seat have helped you.
The purpose of the gussets is to “square up” the seat from a trapezoid shape to a square, so you can weave evenly around all four corners once the inside of the seat is square in shape.
Once the seat is woven, the weight of a person sitting on the chair is evenly dispersed across the seat.
I have never done a rush chair and I have an antique prayer chair with a badly broken seat that I removed. The back has two rails not one and there are no tack marks on the side rails. When I weave, do I put the rush around both back rails at the same time or is there another way to weave it? I want to be sure I know what I am doing before I start. Please Help
Hi Nancy,
Sorry, but I’m not sure what you are asking and am not able to visualize the situation, would have to see it to come up with a solution for you. When you took the seat off, did you take pictures of it that you can use as a method to find out how the previous weaver treated those back rails? If it’s possible, I think you might try weaving a different chair as your first rather than weaving this prayer chair. It’s best for a beginner to start with a very easy chair so you don’t get frustrated. If you want to have someone else weave this chair seat, take a look at the National Furniture Repair Directory™ to find someone near you that can do it. Sorry I couldn’t be of more help.
Peerless rattan co.told me to contact you in regards to a chair I purchased. It has arms that he said are blind caned. He told me u are the only one he knows that has attempted that task. I am willing to give it the old college try. Just need a few pointers. I was going t take one of your classes in southern Indiana due to illness couldn’t make it
Hi Cathryn! You can also use masking tape (not painter’s tape!) to hold the ends as you “square” rush seats to begin them. The tape is removed as the rush is continued. I’ve used this method for many years and it works fine. No fuss, no muss, and everything holds together well without issues.
Oh sure Mical, I use masking tape or strapping tape on my binder cane chairs and footstools too, but never thought of it for rush! See, you can always learn something new. Thanks for taking time to leave a comment.