Ever since I began caning chairs way back in the 1970s, I have never tied knots on the bottom of the cane chair seats.
What did you say??? No knots on a hole-to-hole cane seat chair? Huh?
Use the “no-knot” chair caning technique instead! I had a customer’s chair from the late 1880s that didn’t have all those ugly knots on the underside of the seat.
So, while removing the cane from the seat, I studied their technique and figured out how they did the weaving without tying knots! This type of weaving makes for an incredibly neat underside of the chair seat.
The only knots you might end up with are the ones from the binder when you run out and have to add new lengths. But even then, it would be easy to fix without tying another knot.
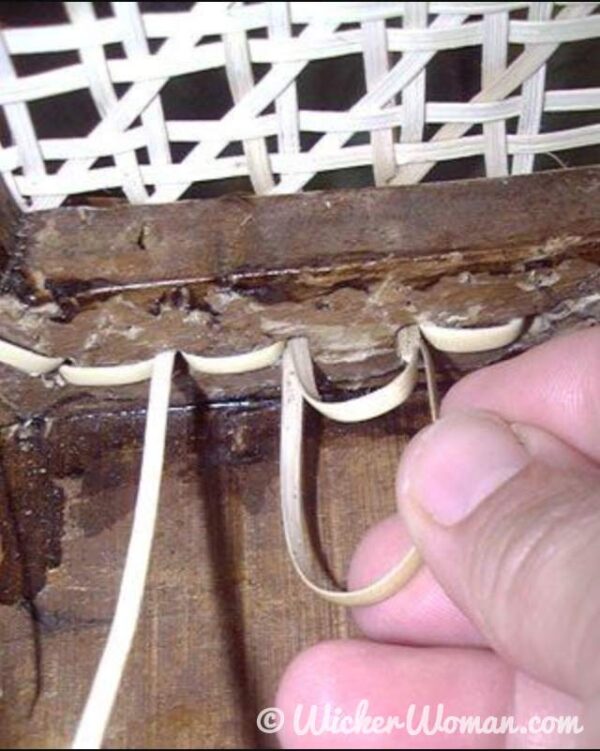
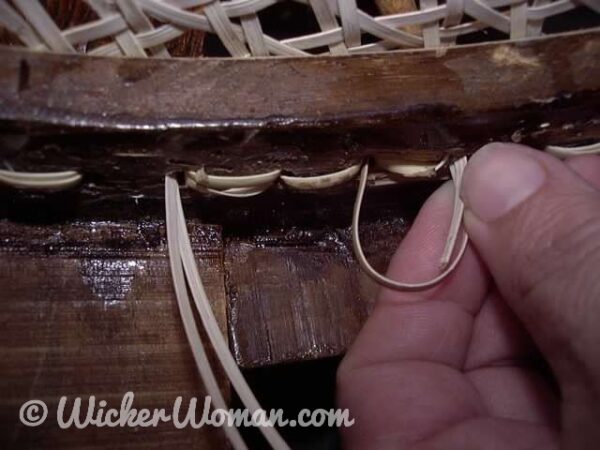
Here’s my process: Let the tail hang down from the hole about three inches, then when you come through that hole again with another strand, you can pick up that tail with your weaving strand and bring the end up as you go into the next hole.
This is what I call “sandwiching” the tail between the weaving strand and the bottom side of the chair frame and also taking it a bit into the hole. The tail, in this case, will always point upward into the hole.
Or if the hole size is small and crowded with other strands of cane, then I will stop it just back a bit from going into the hole, “sandwiched” up next to the bottom wood frame.
You can even pull the end of the old tail completely through the hole to the top side and then cut it off if you like.
However, be very careful when making the cut, so you don’t damage any of the other strands in the hole or cut the wrong one by mistake.
Sometimes the binder cord is the strand that catches all the very last stragglers, but I can get them with the diagonal strands.
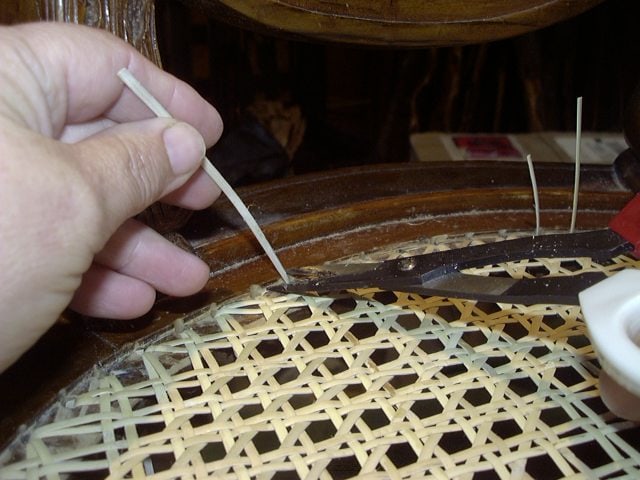
This only works, though, when you have a tail hanging down from a hole and you are going downward into that same hole, then into the one right next to it.
For example, if you are coming down into a hole that does not have a tail, but the tail is in the next hole and you want to go into that one from the bottom, it won’t work.
The two ends are moving in opposite directions and will be fighting against each other.
In the picture below, the weaver is going up the hole, and the short tail is going down; so, they are working against each other. The no-knot chair caning technique does not work well in this case.
Both the tail and the weaver must be going in the same direction.
In the video below, I demonstrate how to finish the final strand or tail of chair cane using the “No-Knot Chair Caning Technique.”

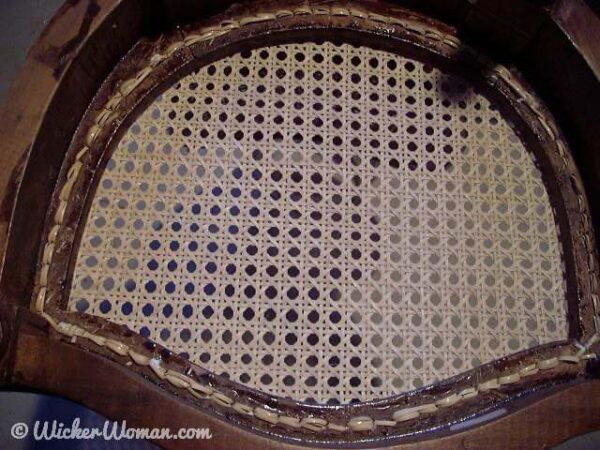
Here’s a picture of a completed horseshoe-shaped chair bottom–sans knots! Isn’t that nice and pretty without all those ugly knots?
If you look closely, you’ll see the wrapping of the final end of the binder cane weaver in the lower left-hand front corner.
Now, do you think you can clean up the bottoms of your chair seat bottoms by using the “no-knot” chair caning technique?

What are your thoughts about this blog post?
Leave your comments below and share with your social networks!
~~Live Well, Laugh Often, Love Much ~~
Happy Weaving, until next time!


What do you do with the last strand of cane when caning the back of a chair, since you will not have another piece of cane to sandwich it between?
Hi Nancy,
All you need to do is to wrap the tail a couple of times around a nearby loop on the back and dab with a bit of white glue to make sure it stays in place.
See the video on the second page of the How-to Videos that’s called, Chair Caning Tips-Binder Cord for a brief explanation. https://www.wickerwoman.com/how-to-videos
Hope this helps!