This paper rush seat weaving tip is about how to begin weaving and “square up” the seat. We will discuss using any of three methods to attach rush strands in the gussets on a trapezoidal (wider in the front than in the back) chair seat.
Measure to “square up” the seat
First, measure the distance between the back rail between the corner posts or blocks. Then do the same on the front rail. With a trapezoidal chair seat, the front rail will be wider than the back.
After you’ve measured the front and back rails to decide how many inches of difference you have between the two, mark that difference on the front rail. So, if the back rail is 12″ and the front rail is 16″, make your marks 2″ out from the right and left corner posts or blocks.
Then you will know how many inches of “short rows” or strands you will need in the front gussets or pockets to “square up” the seat.
Determine best way to attach rush strands to rails
The next step is to decide how to attach the strands to the rails:
- Tack each short row or strand on both inside rails
- Tack only the left side at “foldover” point on inside rail
- Use cable ties on one or both inside rails
#1. Attach short rows with upholstery tacks
In the past, the usual method to attach these “short row” strands to the rails was to nail or tack each individual strand to the inside left and right rails, both at the beginning and end of the strands.
This results in damage to the wooden rails, especially if the seat has been replaced several times. The more replacement seats, the more nails or tacks are pounded into the rails.
#2. Fold rush and attach only on left inside rail
Many times during my 40+ years in the chair seat weaving profession, I’ve run across a simple, better method. With this method, you fold each strand in half and attach the rush at the fold, to the rail with only one tack or nail.
Of course, even with this doubling up method, you still have to end each strand on the right side rail with an individual upholstery tack . So even this way is not preventing all nail holes, only reducing the quantity of them.
I’ve practiced this paper rush seat weaving tip for many years, but then when zip ties or cable ties became so popular, I switched techniques again.
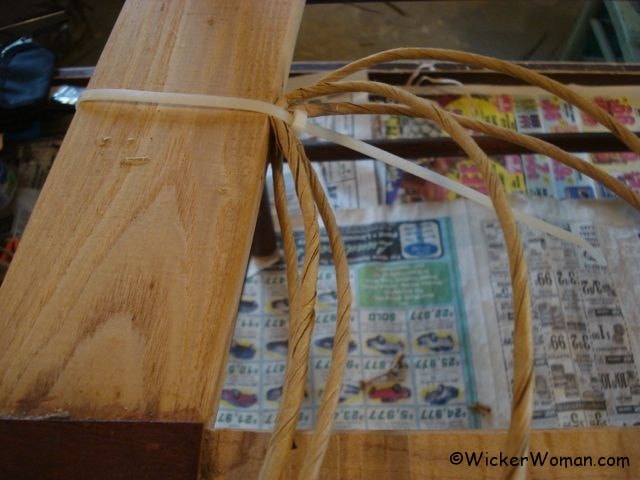
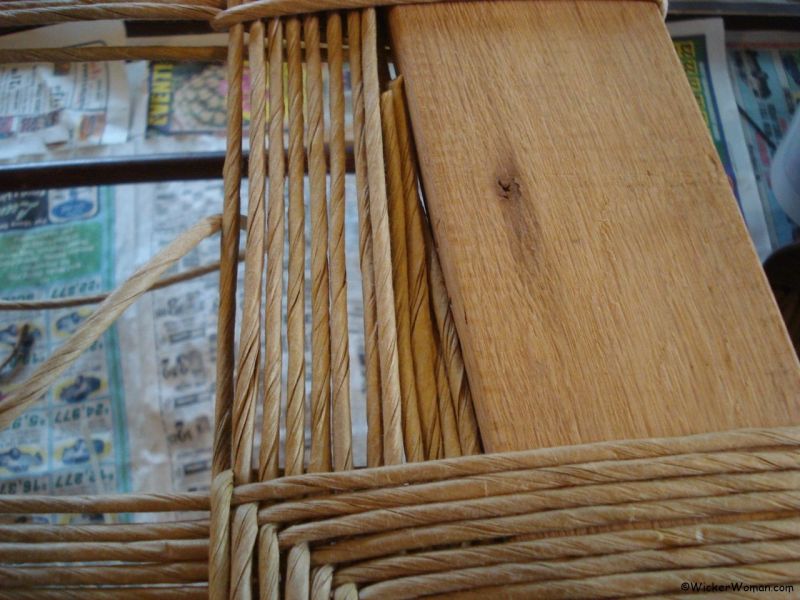
#3. Use cable ties or zip ties to attach short rows
Using cable ties or zip ties when you attach the gusset strands or short rows to “square up” your trapezoidal rush seats, results in no nail holes at all. Isn’t that wonderful?
Please make sure to leave the little connection tab to the inside of the seat, where it won’t be visible.
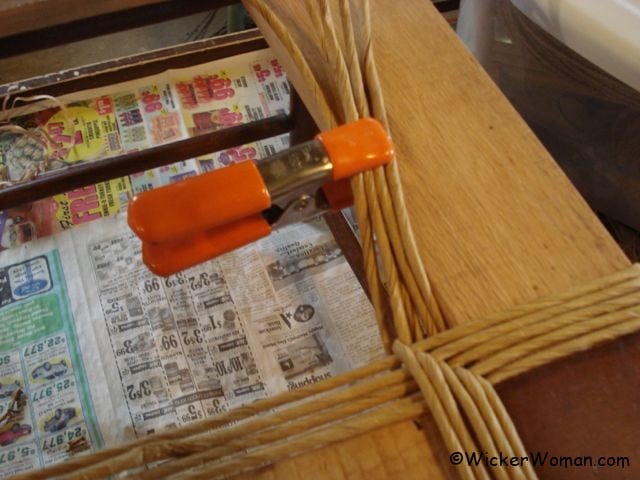
Then on the right side where you end the strands, just use a cable tie again or use a spring clamp to hold in place.
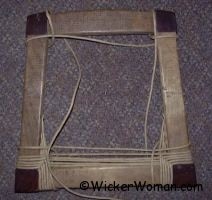
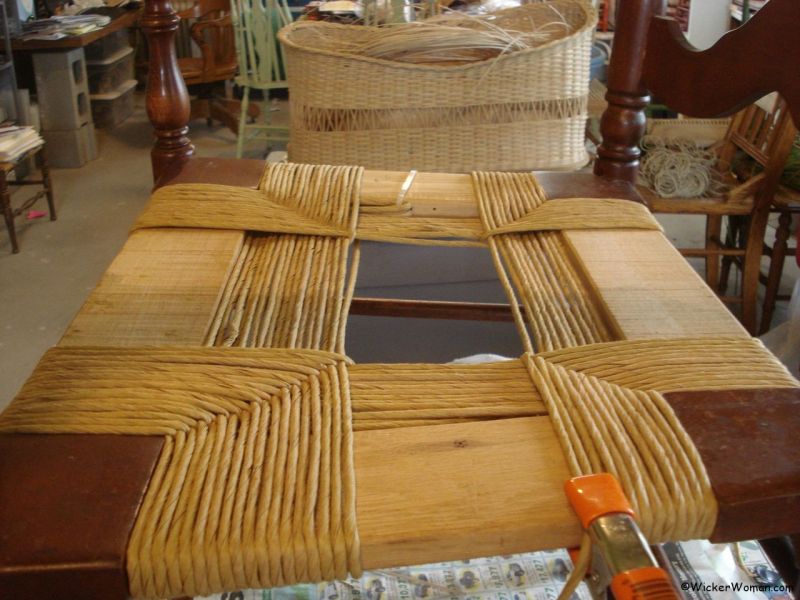
#4. Begin weaving around all four corners
Once you have all the short rows in place and filled in, and the back rail is the same length as the front rail, you are ready to weave around all four corners.
Note that each time you weave around the front corners where the short rows are, they will help secure the short rows in place.
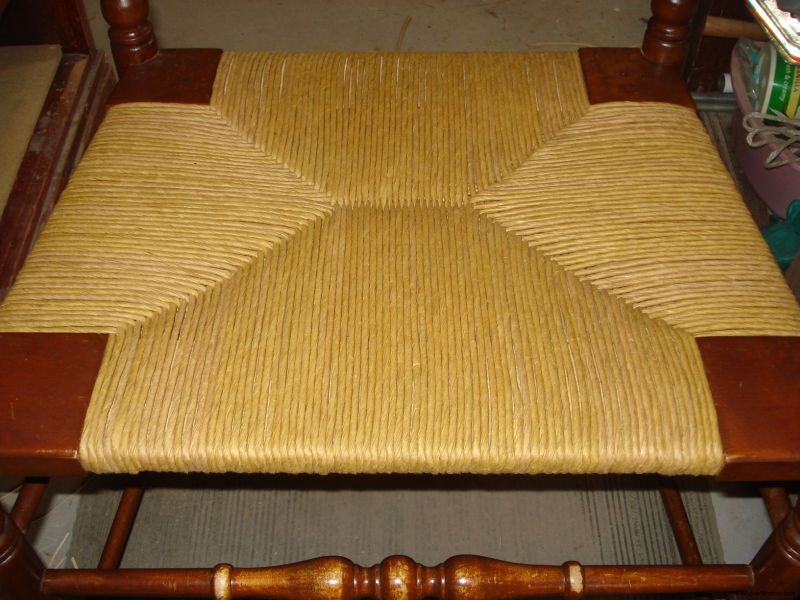
Then eventually, after the other rows of weaving are holding in all the beginning and ending strands, you can remove the cable ties or spring clamps. Friction will keep all the strands in place and they won’t pull out.
If you’d like, you can leave the cable tie at the beginning as I’ve done in the photo below, or you can snip it off after the other weaving is holding those strands in place.
Well, hope you find this paper rush seat weaving tip helpful and will use it to speed up and improve your seat weaving skills.
What has your experience been with starting a paper rush seat? Please leave a comment below!
Until next time…

What are your thoughts about this blog post?
Leave your comments below and share with your social networks!
~~Live Well, Laugh Often, Love Much ~~
Happy Weaving, until next time!


Thanks for the explanation. What do you do in only one side of the seat is not square? My seat has 2 right angle corners on the one side. The other side is angled out. So if I use a square, there is only one side where I need to add short rows, not 2. Suggestions?
David, my goodness! That’s the strangest thing I’ve ever heard of and I have never run across a chair seat as you are describing. Is this a contemporary modern chair by chance?
So, if I’m understanding you correctly, this is not a square chair seat and it’s not a trapezoidal shaped seat either, but instead it’s a combination of the two?
I would need to see this chair and then sit and try to figure out how to weave it. But maybe you could put in some short rows on the left side where it flares out and then tack the ends to the front rail instead of continuing over to the right rail and ending the strand. And keep doing that until that side is squared up like the right side. And then once it’s all squared up, you could weave around all four corners in the normal pattern.
That’s the best I can do off the top of my head without seeing this odd chair seat. Hope that helps, let me know if what I’m imagining is anything like what you have there in front of you!
Thanks for the suggestion. This is a very old two seat settee. What throws me is that the original rush was put in without tacks. Unfortunately the rush is in too bad a shape to determine how they did it. I tried a test of what you suggested, but it just makes the opposite corner off by the number of wraps. I’m going to pretend it’s square and see what happens
Cathryn, how do you work out how many strands you need to square up the seat? I’m about to tackle one that is 14.5 inches / 37 cm wide at the back and 19.5 inches / 50 cm wide at the front. And what happens if you don’t do this at all? … Or get the amount wrong?
Hi Mike,
Sorry about this blog post, I will need to rewrite it to better explain the steps in squaring up the seat. First, measure both the front rail and the back rail as you have already done. Then subtract those two measurements. This will give you the difference between the two rails. Next, take that difference and divide it in half. That final number will be the amount you count out from each front leg post to the center, where you make your marks.
So in your case you would subtract 14.5″ from 19.5″ = 5″ then 5″ divided by 2 = 2.5″. So on the front rail, measure out 2.5″ from the corner posts on each side and make a mark. That length on the front rail in the center should now be the same as the measurement of the back rail, thereby “squaring up” the seat.
Once you have the seat squared up you need to fill in the gussets. Gussets are the triangles between the front leg corner posts and your marks, which will be filled in with short lengths of paper rush. Those short rows only go from side rail to side rail, woven only around the front rail and the front side rails. They do not go around all four corner posts.
If the gussets are not filled in first, the back rail will fill in way before the front, which will leave a big gapping area in the front rail that can’t be finished. Hope that helps to clear things up.
I collected a big bunch of cattail rush a couple of years ago and stored it up in my garage attic. Do you think it is still usable for a project? Can I bring it down, wet it, and wrap it in plastic for several hours and then use it. Or am I wasting my time!!! Thanks ! Tom (member of Seatweaver’s Guild)
Hi Tom,
Nice to hear you gathered your own cattails but as far as using those old cattails, it depends entirely on how they were stored. Did you follow my instructions as described on the How-to Process Cattail Leaves page? If they were bundled up and covered with either corrugated cardboard or newspapers and stacked neatly and are not bleached out by the sun, then they might be usable. But if just thrown up into the rafters or something and not protected they might be kinda iffy.
You could weave the seat and decide during the process whether or not they are usable. Just keep in mind that you might need to tear the seat out and reweave with better materials. Use this session as a learning project to perfect your skills! Good luck and keep in touch, let me know how they work out for you!