Here are helpful chair caning instructions on how-to cane chair seats by hand, lace or strand and a little chair caning video to whet your appetite, too. Enjoy!
CHAIR CANING INSTRUCTIONS–HOW TO WEAVE A LACE CANE SEAT
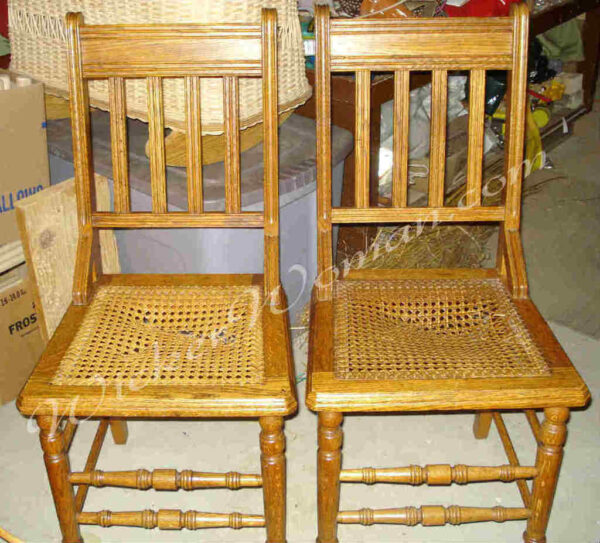
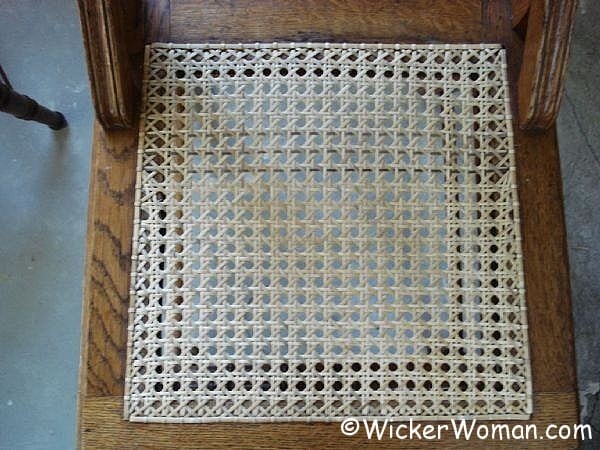
You’ve probably run across the lattice-look weaving on some chair frames that your grandmother had or you saw at a flea market. Or maybe you even have some yourself that need repair. Well, here’s how we fix them and you can too!
Difficulty Level: Moderately Challenging Instructions
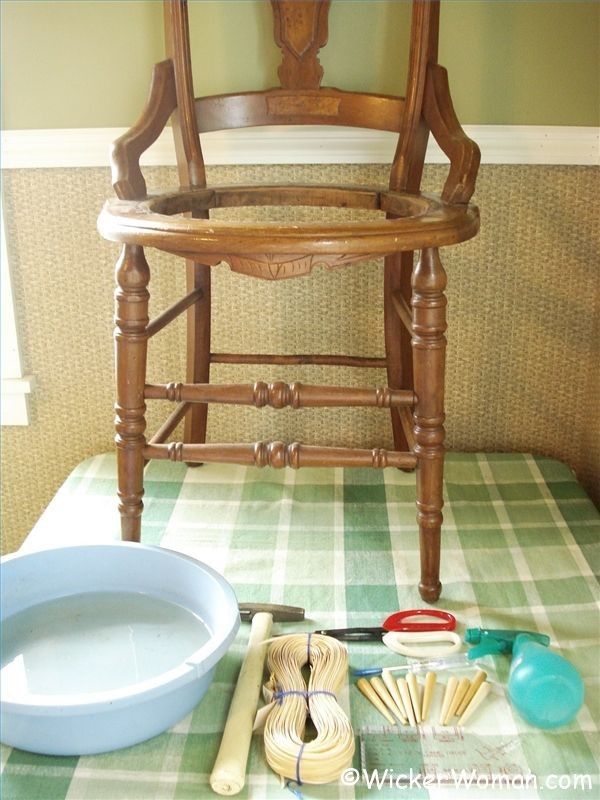
Things you’ll need for this chair caning project:
- trapezoidal shape (wider in front than in back) chair with straight seat rails and pre-drilled holes around the perimeter of wooden frame seat
- 270 feet of strand chair cane and 6 feet of binder cord, in the correct gauge for the project
- work table to place the chair on, make sure it’s the right height so you don’t have to bend over
- measuring tape or chair caning gauge tool and/or cane gauge conversion table
- 1-2 dozen chair caning pegs
- dishpan or water bucket
- scissors
- small hammer or tack hammer
- awl or ice pick
- 1/4″ diameter wooden dowel rod
- water-soluble white glue or hide glue, but not yellow carpenter’s glue or gorilla glue
- spray bottle
- bath towel or hand towel
HELPFUL CANING PREP TIPS:
For your first attempt, find a chair that is sound and not in need of refinishing or regluing. There should be holes drilled around the perimeter in the frame.
Your best first practice piece would be a square or rectangle footstool. Or if you can’t find one of those, a trapezoidal shape chair (wider in the front than the back), with fewer than 72 drilled holes is the next best thing.
Round chair seats, horseshoe-shaped, and chairs with over 72 drilled holes are the most difficult and not good for your first attempt.
If there is old cane in the seat, you will have to remove the cane using scissors and/or a utility knife or box cutter. Start your caning project with a good, sound chair with drilled holes that are totally clear of old cane.
RELATED READING: How to remove cane from chair seats
DETERMINE CORRECT SIZE CHAIR CANE TO uSE
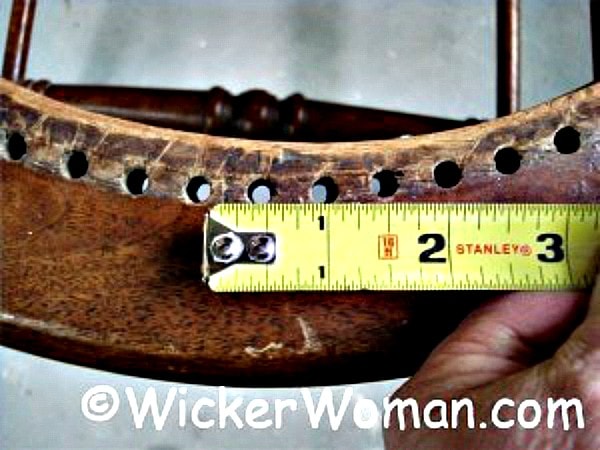
To make sure you are using the correct gauge or size of strand cane for this project, you will need to measure the diameter of the drilled holes. And also measure center-hole to center-hole of its neighbor.
Using a measuring tape, take measurements from several places around the seat frame. Not all holes might have been drilled correctly or evenly spaced.
Write down the measurements so you can examine and compare the different readings with the conversion table:

RELATED READING: Quick way to determine cane gauge
ORDERING THE CORRECT GAUGE CHAIR CANE
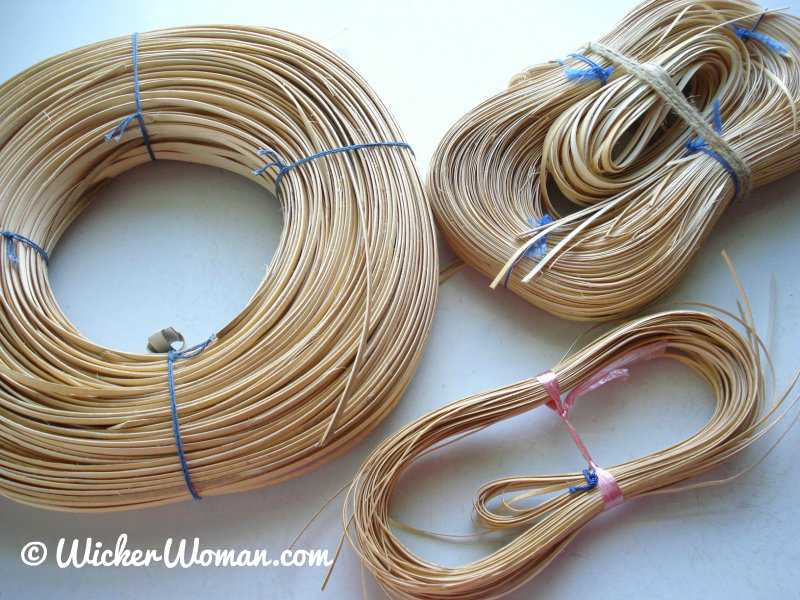
Once you have determined the correct size cane to use for your project, you can purchase the cane and binder cane from the cane and basket supply companies here on my website.
ASSEMBLE ALL NECESSARY TOOLS FOR CHAIR CANING
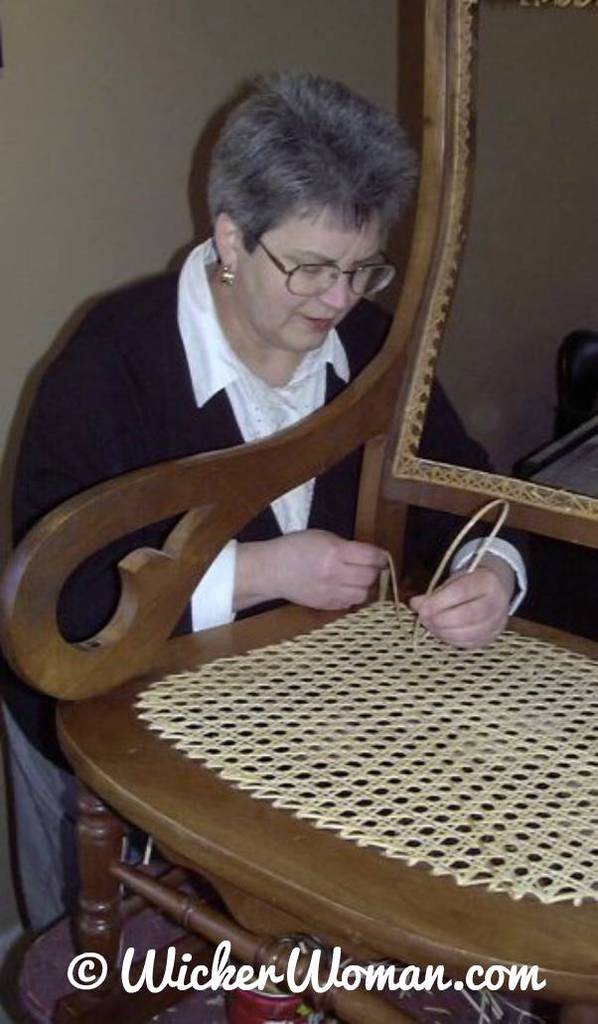
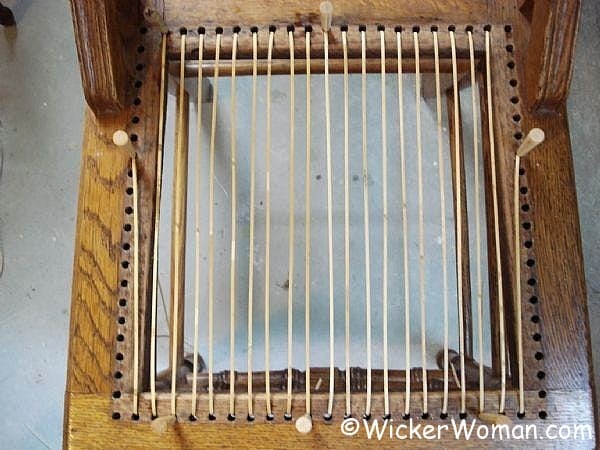
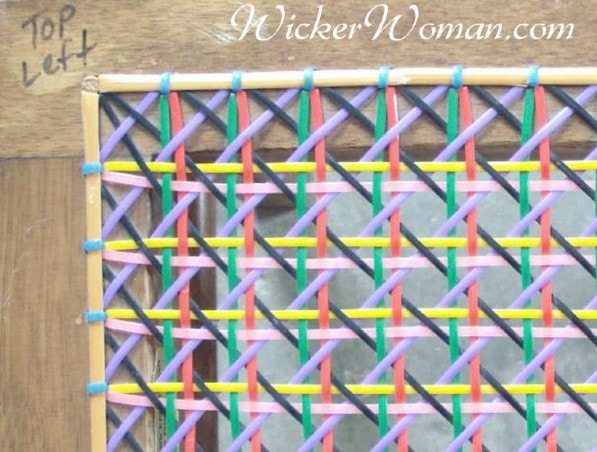
STEP #1 — LAYING THE VERTICAL CANE STRANDS
Remove a few strands of chair cane from the hank and loosely coil them in a dishpan of warm water to soak for about ten minutes.
Periodically replace the soaked cane strands with new ones in the water, so you constantly have a supply ready and waiting.
But don’t soak the cane any longer than 15 minutes or it will start to deteriorate and discolor.

DETERMINE CENTER HOLES FOR BALANCED WEAVING
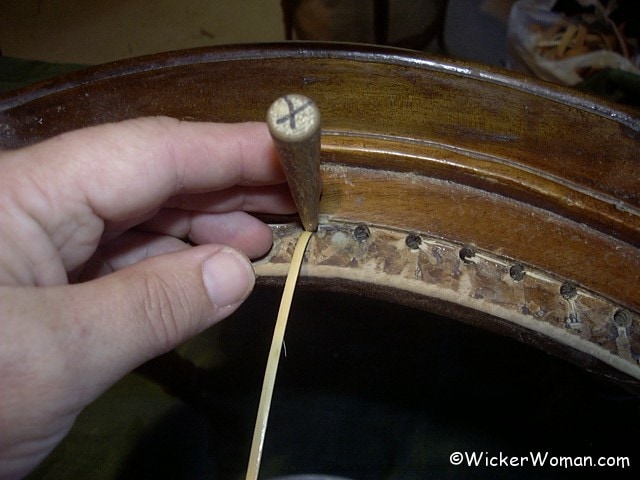
Meanwhile, find the center hole in the front and in the back of the chair seat and put a peg in each one to mark them.
If there are two center holes, select either the right-hand side ones to peg or the left. Doesn’t really matter which one you choose, just be consistent.
Take a strand out of the water and examine it for any breaks or weak spots. Discard any inferior pieces or cut the blemishes off, especially if they are at or near the end of the strand.
Select the longest strands you can comfortably use in these first three steps while setting the foundation.
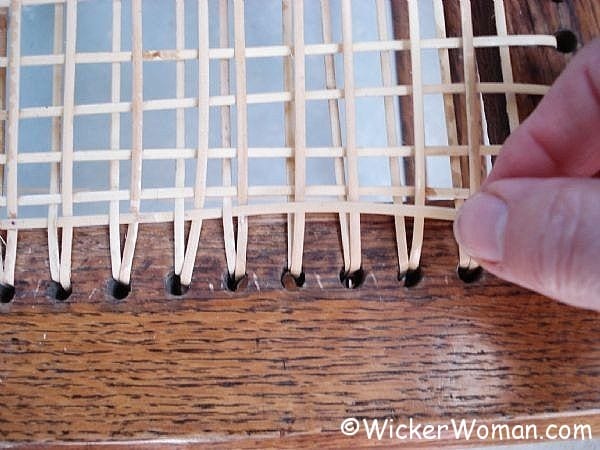
Place one end of the strand in the center back hole, leaving about two inches beneath the chair. Put a peg in the hole to hold it in place.
Make sure that the shiny, glossy side, which is the right side, always faces you or faces upward. Take the long end of the strand and insert it into the center hole in front and peg it.
Next, take that long end that you just pegged and bring it through the hole to the right, still on the front rail, coming up from the bottom.
Then when it gets to the top, take the end of the strand and carry it over to the back rail again in the next hole to the right of the pegged hole.
TAKE NOTE: Even when you turn the chair upside-down, the glossy side of the cane underneath and between the holes on the bottom of the frame should always be facing you or upward.
Make sure that the “right” side of the cane is always facing you, not the dull “wrong” side. That includes the top side of the seat and the cane on the bottom of the chair frame where it goes from hole to hole.
SHORT ROWS AND SYMMETRY OF SIDE RAILS
You will also have some short rows with a trapezoidal chair, so be sure to also add those rows. Go into the same hole on the right rail as the left so the seat stays symmetrical.
And try to keep the short row strand as parallel as possible to the others. As you will see, there’s only one short row on each side of the sample chair I’m using here.
TAKE NOTE: DO NOT PUT ANY CANE IN THE CORNER HOLES, they will be used later during STEPS #5 & #6 when you weave in the diagonals.
Skip the four corner holes at this time. Continue threading the long end of the strand back and forth from front to back all the way across the chair to the right.
Then do the same thing with all the holes on the left side of the chair seat.
Pull each strand taught, but not tight and keep the cane slack but not sagging.
There should be a little give, but not too excessive.
TAKE NOTE: Since the strands are woven while wet, they will shrink as they dry and tighten.
If you start out too tight, there’s a chance that when the wet cane dries, it will shrink tight and break the framework right down the holes.
RELATED POST: How tight is too tight for cane seat?
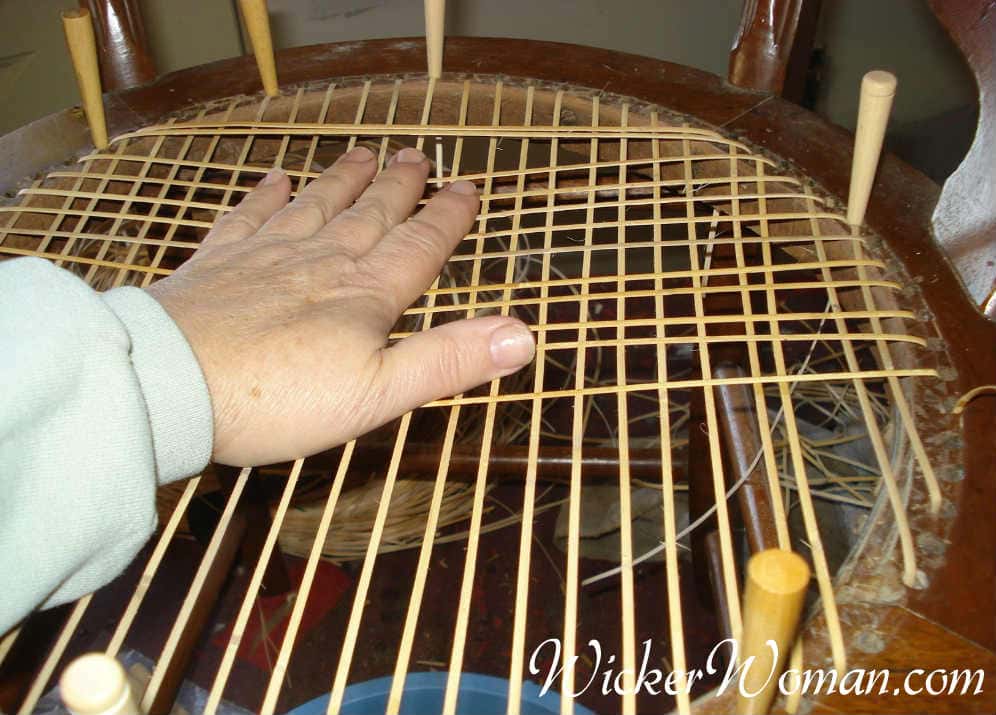
STEP #2 — LAYING FIRST HORIZONTAL CANE STRANDS
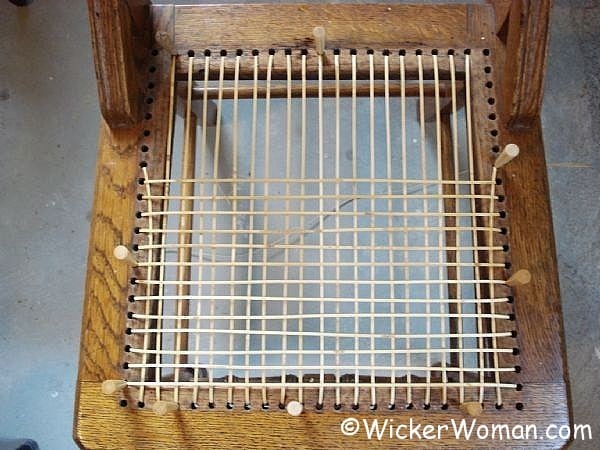
Now continue laying the horizontal strands from side to side, on TOP of, or OVER STEP #1 that you just put in.
Add new strands just as you did before and keep strands parallel, and do not add cane to the four corner holes, just yet.
STEP #3 — LAYING SECOND VERTICAL CANE STRANDS
With this step, begin laying the second vertical strands front to back, OVER the top of STEPS #1 & #2, and just slightly to the RIGHT of STEP #1, the first vertical.
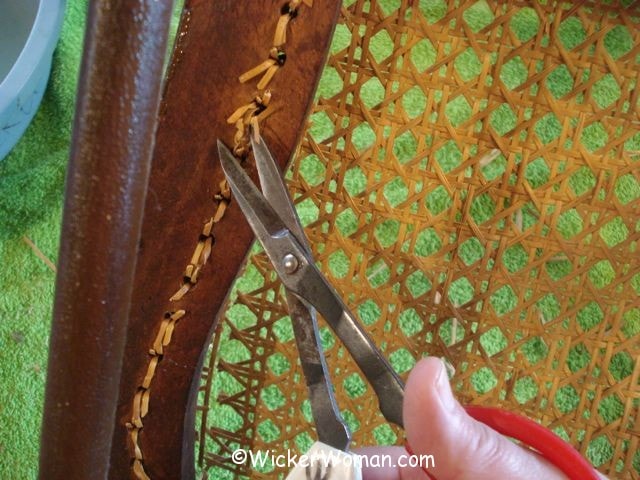
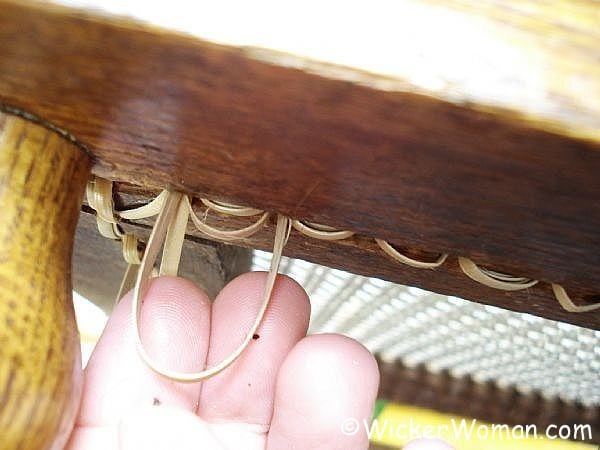
Wondering what to do with all those “tails” when you quit one strand and start another?
To avoid tying knots with those ends and ending up with a sloppy, messy underside of the chair seat like this:
Use an alternative method, such as my “No-Knot” System of Tying Off Cane Strands video to eliminate nasty-looking chair caning knots.
Discover the best way to finish off the ends of the cane strands, without tying knots. And if there do happen to be any remaining “tails” after your seat is woven, you can pick those up too, when you apply the binder cord.
By practicing my “No-Knot” System of Tying Off Cane Strands your chair cane seats will have virtually NO-KNOTS on the underside (or at most, maybe only one or two).
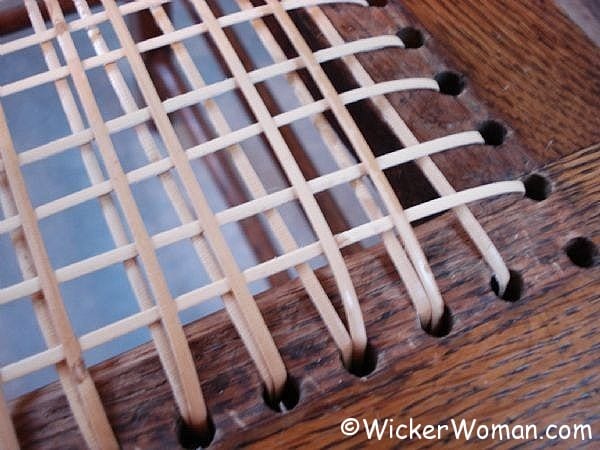
STEP #4 — SECOND HORIZONTAL CANE STRANDS
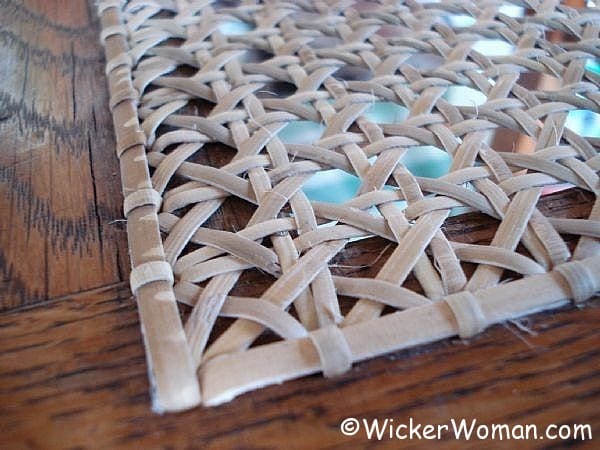
The real weaving begins with the second side-to-side step or course. Horizontally alternating under-over weave through the doubled/paired front-to-back or vertical rows.
You can start weaving with a new strand either in the back or at the front rail. Whichever seems most comfortable to you. And you can start on either side, it doesn’t matter.
Begin weaving with the strand running parallel to the horizontal of STEP #2. It should be below it, or closest to your body.
You will be weaving over and under the two vertical pairs of strands. Weave UNDER the strand on the left which was STEP #1, and OVER the strand on the right, which was STEP #3. Continue this horizontal weaving until all the rows are finished.
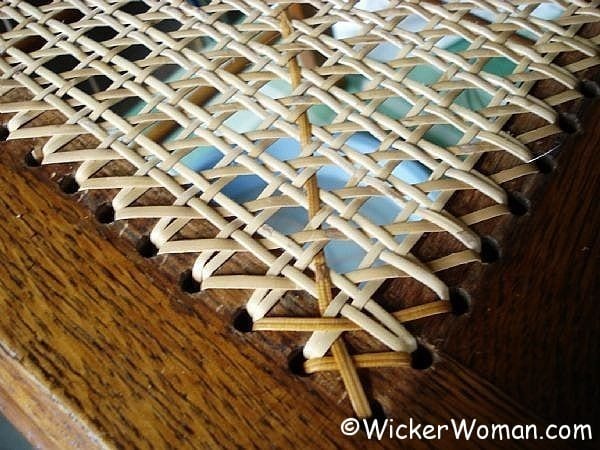
STEP #5 — WEAVING THE FIRST DIAGONAL CANE STRANDS
Start the first diagonal course in the front left-hand corner of the chair. This step will be weaving ALL the diagonal strands and will slant from the lower left side to the upper right side.
Begin this step by taking a new strand and inserting it into the left front corner hole. (Remember this is the hole we left empty throughout all the other weaving steps). Leave a 2″ tail below the seat as before and peg off.

Taking the end of the long strand, begin weaving OVER the VERTICALS or front-to-back pairs, and UNDER the HORIZONTALS or side-to-side pairs.
You will NOT end up in the corresponding back corner hole on the top right of the chair (unless you are weaving on a square seat). But wherever you end up, go down into the hole and then come up in the hole to the right.
As you weave all the other diagonals, you’ll discover that you need to make “fish heads” at several places along the side rails.
Fish heads are whenever there are two diagonals coming from the same direction, going into the same hole.
You put in these fish heads to make sure there are “Xs” all down both sides, and at the back and front also.
READ MORE: How and why to making fish heads
STEP #6 — SECOND DIAGONAL CANE WEAVING
This step will complete the weaving of the opposite diagonal, which is at right angles to the first course. ALL the diagonals that slant from the lower right side to the upper left side will be finished here.
Begin this course at the lower right corner, leaving a 2″ tail as before, peg it and begin weaving upward to the left corner area.
This time weave OVER the HORIZONTALS (and the strand from STEP #5) or the front-to-back pairs and UNDER the VERTICALS (and the strand from STEP #5), or the side-to-side pairs. You will be going over and under three strands at a time, not just the pairs.
Remember, when you come to the corner hole again, begin a new strand, making a “fish head” and continue weaving back and forth until you complete the entire second diagonal course.
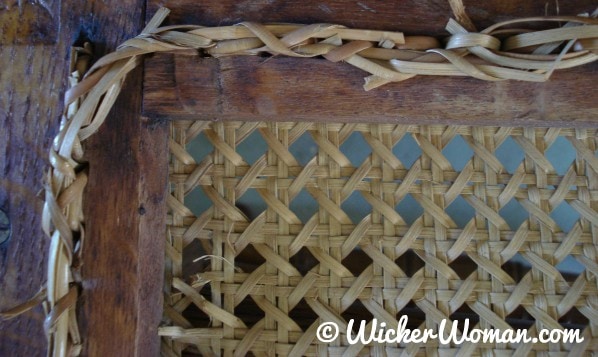
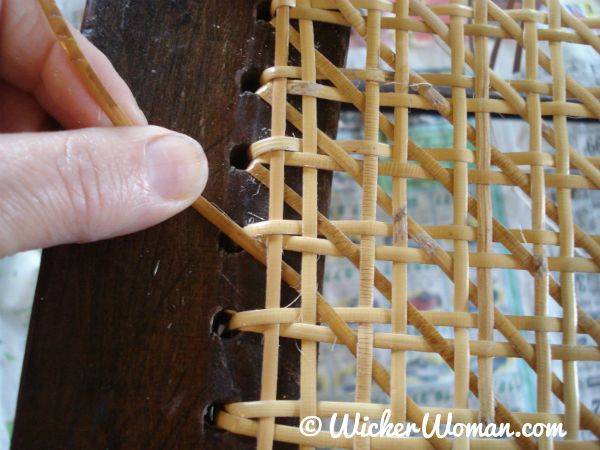
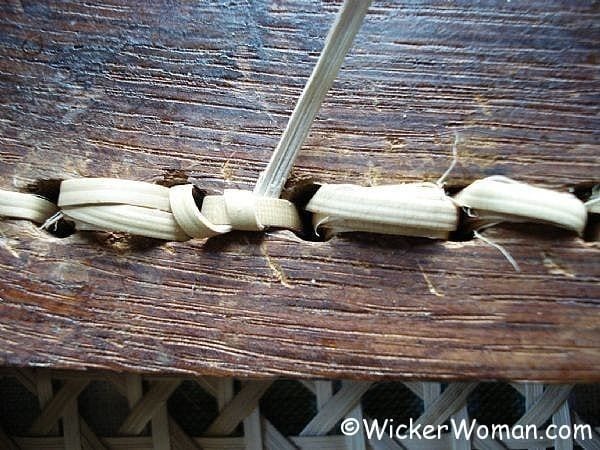
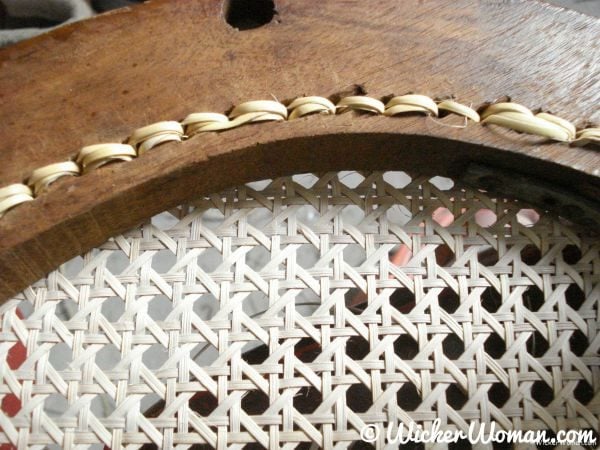
STEP #7 — APPLYING THE CANE BINDER CORD STRAND
Here is the final weaving step of these chair caning instructions; apply the wide binding cane and “sew” it in place.
This will cover up the holes and give a nice finished look to the woven cane chair seat.
Use separate lengths of binder cane for front, back, and both side rails. So each piece runs from corner hole to corner hole on this trapezoidal chair seat.
Cut them slightly longer than needed so they can be put into corner holes at each end and pegged to hold temporarily.
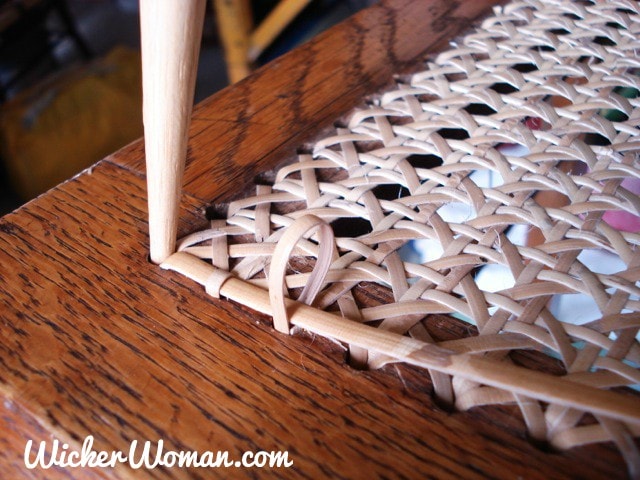
Begin by securing the front rail binder cord in the left corner hole with a peg.
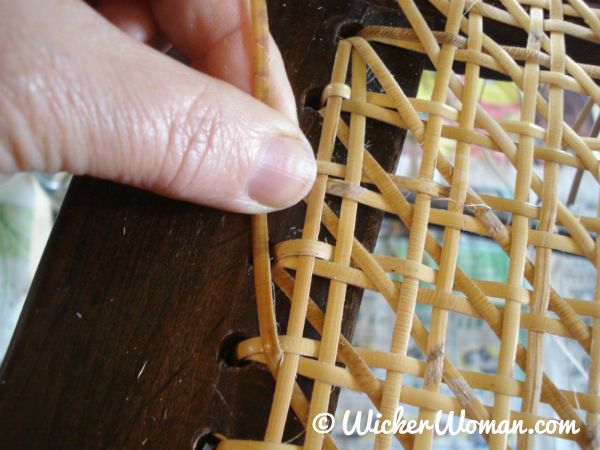
Then using a long length of weaving cane, put one end down the backside of the next hole to the right of the corner.
Loop the long end of the weaver, over the binder cord and down into the front side of the same hole.
Then on the bottom side of the chair, bring the long weaver upward into the next hole to the right, the backside of the hole.
Loop over the binder again and down into the front side of that same hole.
Continue this looping process moving to the right one hole, each time and pick up any loose “tails” and incorporate them or “sandwich” them under the binder cord in the “No-Knot” fashion.
You will go around the entire four rails of the chair seat with the binder cord, adding the new length at each corner and securing it with a peg to hold it.
BONUS TIPS FOR STEP #7 — BINDER CORD CHAIR CANE & NO KNOTS
Pick up any loose “tails” or ends as you go around with the binder cord, so you don’t have so many to tie off afterward.
Tie off any that weren’t caught by the binder and put a spot of white glue on the knot to hold.
See my Chair Caning Tips — Binder Cord video for more helpful hints and tips for working with the binder cord on hand caning.
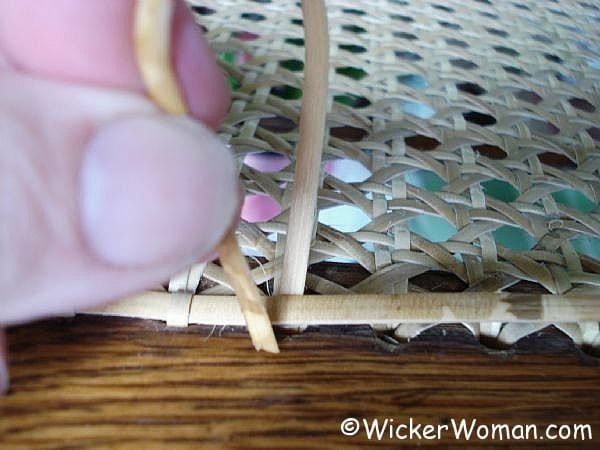
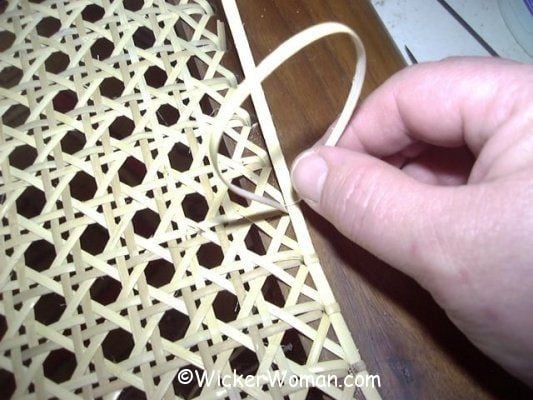
BONUS TIPS FOR STEP #7 — CANE BINDER CORD CORNERS
Corners can be pegged with a short piece of wooden dowel rod or even round, rattan reed of the appropriate size. No need for glue, unless it’s just a little spot. Or, you can just fold over the top binder strand over the bottom one inside the hole.
CONGRATULATIONS! YOUR TRADITIONAL STRAND CHAIR CANED SEAT IS DONE!
Congratulations! You’ve finished your first traditional hole-to-hole cane seat weaving project.
Now, follow my chair caning care tips to make this seat last for a very long time.

Hope you enjoyed this FREE article on “Chair Caning Instructions.”
Please help to support this information site by donating generously, click on the image below!

Articles, Tip Sheets, Reports <– Back to
NEXT –> How-to Remove Cane Webbing