How to remove chair cane spline is one of the first things you must know when restoring a broken cane webbing chair seat. Use these simple directions to show you how, and you’ll be a pro in no time.
Repairing and replacing sheet cane, machine-woven cane, cane webbing, or removing spline caning (as it’s also called) is one of the easiest types of seatweaving techniques to master. But one step in the process might cause you great frustration–removing stubborn reed spline from the groove!
Follow these three simple steps, with accompanying photos, to gain the confidence to tackle the project yourself, even if you are a beginner!
TWW is reader-supported, and as such, this article may contain affiliate links, which means that if you make a purchase using these links, I may receive a commission at no cost to you. As an Amazon Associate, I earn from qualifying purchases.
***Need to purchase materials, tools, and other caning supplies? Buy from these reputable retail businesses listed on my National Cane and Basket Supplies Directory™ page.***
Assemble The Necessary Tools
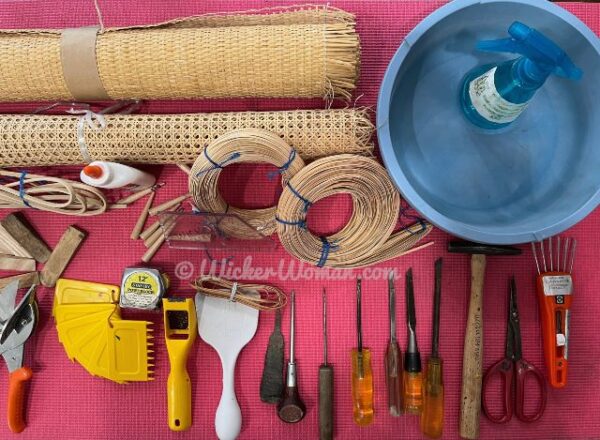
Having the correct tools for the job will make this task easier and more pleasant. You can get by without some of these tools, but to have them available if you need them is always a good idea:
- utility knife or box cutter
- miter cutting tool
- electric drill and drill bits, and maybe a Dremel tool with attachments
- special spline removal chisel of correct width to fit into the groove
- basketweaving scissors
- squeeze water bottle
- hammer
- sandpaper, wood rasp, or Shur Shaver
- cleaning grade white vinegar or denatured alcohol
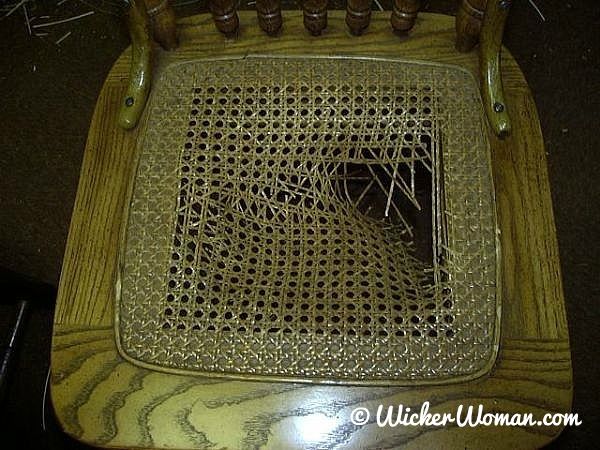
Step One: Removing the Old Cane & Spline
Using your utility knife or scissors, cut out the old chair cane webbing in the center of the seat to clear the area.
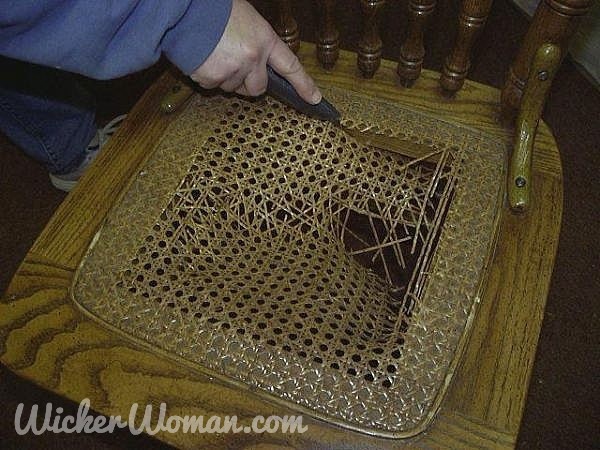
Then, using your utility knife with a new, sharp blade or box cutter, score around the outside of the spline. Be sure to go all around the chair seat when you score, not just partway. This loosens the varnish or paint that might be on the chair, as well as loosening some of the glue inside the groove.
Take care you don’t accidentally damage the surrounding wood of the chair seat with your knife while removing the cane and spline.
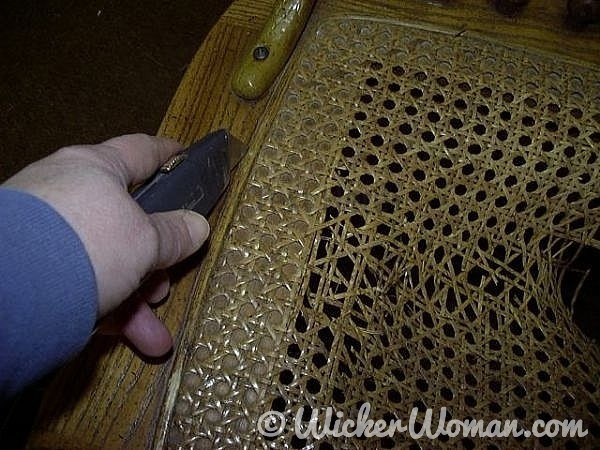
Just for good measure, using your utility knife again with a sharp blade, score along both the inside and outside edges of the groove on either side of the reed spline you will be removing.
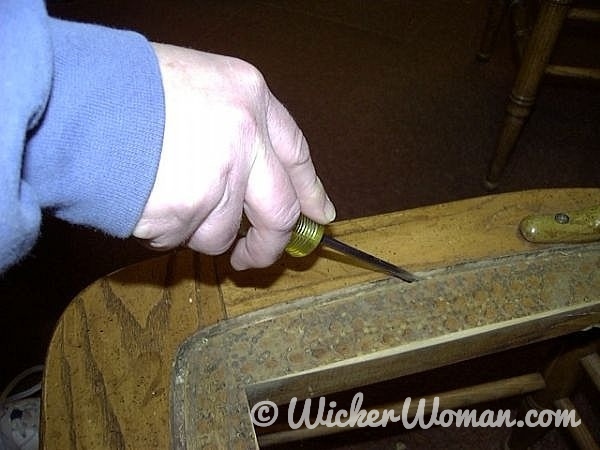
Step Two: Loosen and Pry up the Spline
If you are working on a round seat, you will begin removing the spline at the back where the butt ends of the spline meet.
If you are working on a trapezoidal seat (wider at front than back) with mitered corners, start in the middle of either the front or back rail, so as not to damage the corners of the chair frame. Just cut into the spline using the sharp chisel, tapping with the hammer.

Insert the special caning chisel into the spline and, using an upward rocking motion, begin prying up the spline. Lightly tap on the end of the chisel with your hammer to help force along the groove.
Sometimes, if you are lucky, the entire spline will come out in one motion, but more likely it will come out in small pieces. So, take your time and don’t rush the process.
**If this proves too difficult, an alternative method to removing the spline is to drill several holes into it (don’t go into the wood below the spline), spaced several inches apart along its length.
Then, using a fine-tip squeeze bottle filled with denatured alcohol, squirt the liquid into the holes. Wait about 15-30 minutes for the denatured alcohol to soften the glue in the groove.
Step Three: Cleaning the Groove
Clean out any remaining cane and glue from the groove using your hammer and chisel, utility knife, and/or Dremel tool attachment.
This can be a rather messy procedure, so have some old rags or towels on hand to clean up.
You must remove all traces of the old glue because the new glue won’t adhere to old glue.
After all the old cane and spline are completely cleaned out of the groove, sand the rough edges on both the inside and outside of the groove. This will help to prevent the new cane from breaking after it’s installed.
RELATED READING: How to Care for Your Cane Furniture
Final Touches

It’s also a good idea to use a rasp or Stanley Sure-Shaver to bevel (round off) the inside edge of the chair seat frame before installing the new cane and spline.
Then smooth both the groove and the sharp edge of the chair seat frame with sandpaper.
If the sharp 90º edges are not rounded off, then they might cut the new sheet cane after the seat has been used for a while.
As people sit on the cane seat, the cane will begin to sag, and as it does, the sharp edges may cut into it, thereby damaging the cane and requiring the seat to be replaced sooner than necessary.
Congrats! You’re all done removing the spline! Now follow these how-to instructions to install cane webbing in your chair!
RELATED READING: How to insert cane webbing like a pro!
Alternative method to remove cane spline–Use a steamer!
Here’s a video of Debbie Kinghan from California demonstrating how to use a steam machine to remove the chair cane spline and webbing.
This demonstration was presented in 2008 for the members of The SeatWeavers’ Guild, Inc.® at our second annual Gathering in Nelsonville, Ohio.
Hope this FREE “How-to Remove Chair Cane Spline” article has been of help to you today. And thank you very much for your kind donation, which helps us provide more free “How-to” articles for you!
Check out all the How-to Videos by Cathryn for more hints and tips on Chair Caning Tips, Antique Wicker, Antler Baskets and more!
Come back soon to see more updates and article additions to WickerWoman.com!

<–Back to FREE Articles, Tip Sheets, Reports
Next to–> How-to Install Cane Webbing