Have you ever used this alternate way to finish the binder cane corners when weaving a trapezoidal hole-to-hole cane chair, rather than pegging them off?
Here’s a handy chair caning tip of the day to make your cane weaving look its best.
How-to Finish Binder Hole Cane Corners
I love using this quick, clean method to finish off or treat the cane in the drilled hole corners of a trapezoidal cane seat chair when applying the last of the seven steps of lace caning, the binder cord.
RELATED: Weaving the 7-steps of Hole-to-Hole Caning
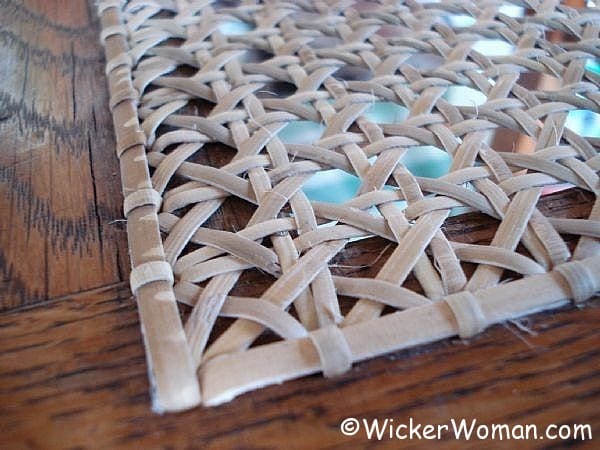
Each of the four corner holes on this hole-to-hole traditional cane seat using the wide binding cane was overlapped.
Watch the video below and you’ll see what I mean!
The standard method of finishing off those corners is to put both ends of the binder cord in the corners. Then put a small wooden dowel or peg in the corner to hold the ends of the strands.
But I think this alternative method of overlapping the wide binding cane strands saves a step (by not using the peg) and looks cleaner and neater. Won’t you agree?
Subscribe to my YouTube channel so you don’t miss any of the new video how-to tutorials and chair caning tips! https://www.youtube.com/thewickerwoman
Have you ever tried this method of working with the binder cane in the corners? Or do you always peg them in the traditional chair caning manner? What method do you use to finish the corners?


Do you have any helpful hints for binding off a round hand-woven seat?
Hi Coralee,
I’m not sure I understand your question, since “sewing” on the binding cord on a round chair is very similar to putting it on a trapezoidal or horseshoe-shaped seat.
The only differences are that you are using only one continuous strand of #4 wide binding cane and how you want to finish off or join the ends of the strand where you start and stop.
Just make sure to keep the binder cord fairly wet and ease it around as you move around the perimeter so it doesn’t crease or break or buckle.
Be sure to use my No-Knot caning technique and pull up any remaining short cane tails so there aren’t knots on the bottom.
And when you complete the binding step, there are a couple ways to finish at the join. One of the easiest ways is to actually overlap the start and finish ends but still apply that last wrapping in the center hole in the back where the overlap is. And the standard, second way is to put a wooden peg in the hole where the two start and finish ends are.
Hope this answered your question and that I got it right.
I am attempting to replace the can on the back of a chair.
I have the woven sheet of caning.
There were 4 strips of wood tacked on the back to secure the caning
What are they, hand where can I find new ones?
They were not in great condition once I remotes.
Thank you
Sallie
Hi there Sallie,
So sorry to hear you are having problems with what sounds like a cane webbing on the back of your chair. Without seeing a picture of the chair, I’m just guessing here, but it sounds like those four strips of “wood” might be reed spline instead of wood. The spline is usually in a groove and held in place with glue.
The spline can be purchased from any of the suppliers listed on my Cane and Basket Supplies Directory™. You will probably need to measure the depth of the groove and the width and then either call the supplier or look through their online catalogs to place your order along with the new sheet cane.
Be sure to visit my “How-to Install Cane Webbing” blog post and then the full How-to Install Cane Webbing instruction page for written directions along with photos of each step BEFORE you order your supplies and begin the installation. Good luck, hope this helps!
Hi Cathryn,
I have always used the peg in the corner but I like the way it looks when you overlap the horizontal over the vertical. Do you use glue there as well? I am always looking for ways to make the finished chair that much nicer.
I almost always used wooden dowels and a spot of glue in the corners too, but decided to try this look and it works just fine. No, there’s no need for glue in the corner holes, but I do make the ends a bit longer so they overlap well (not too long though, don’t want them poking below the seat frame on the bottom).